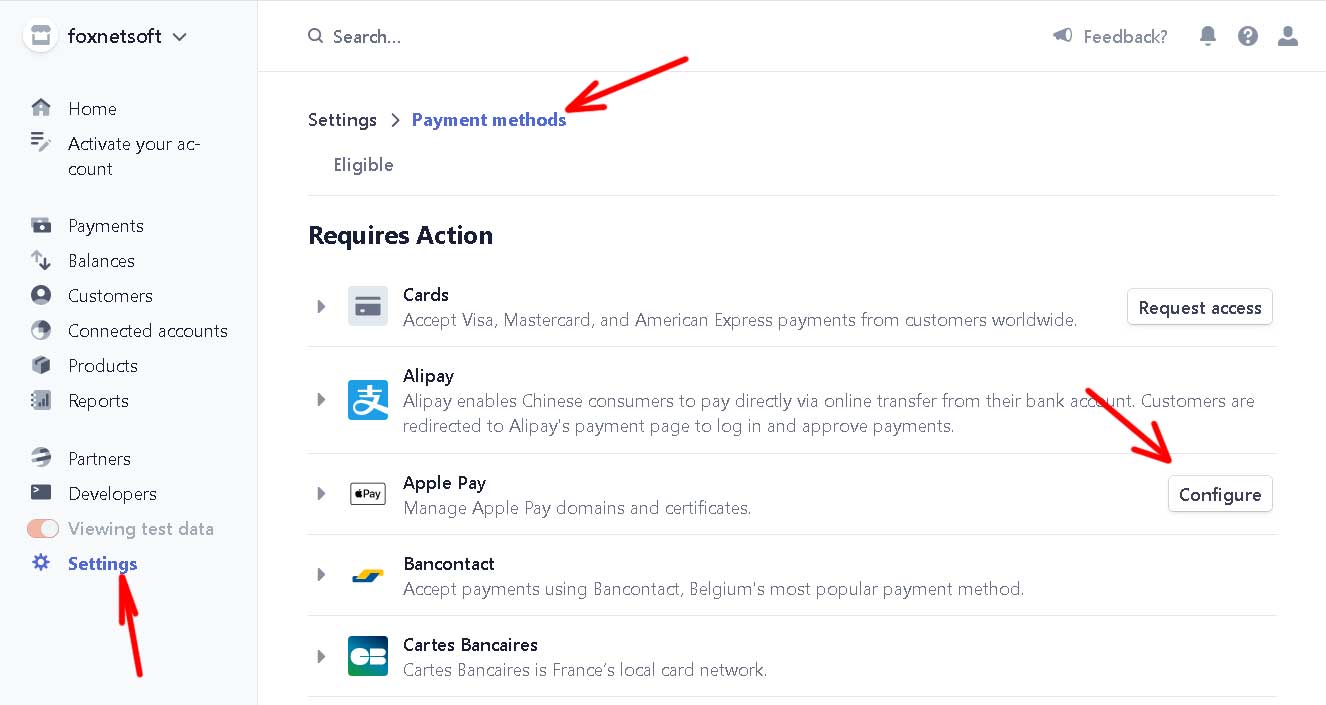
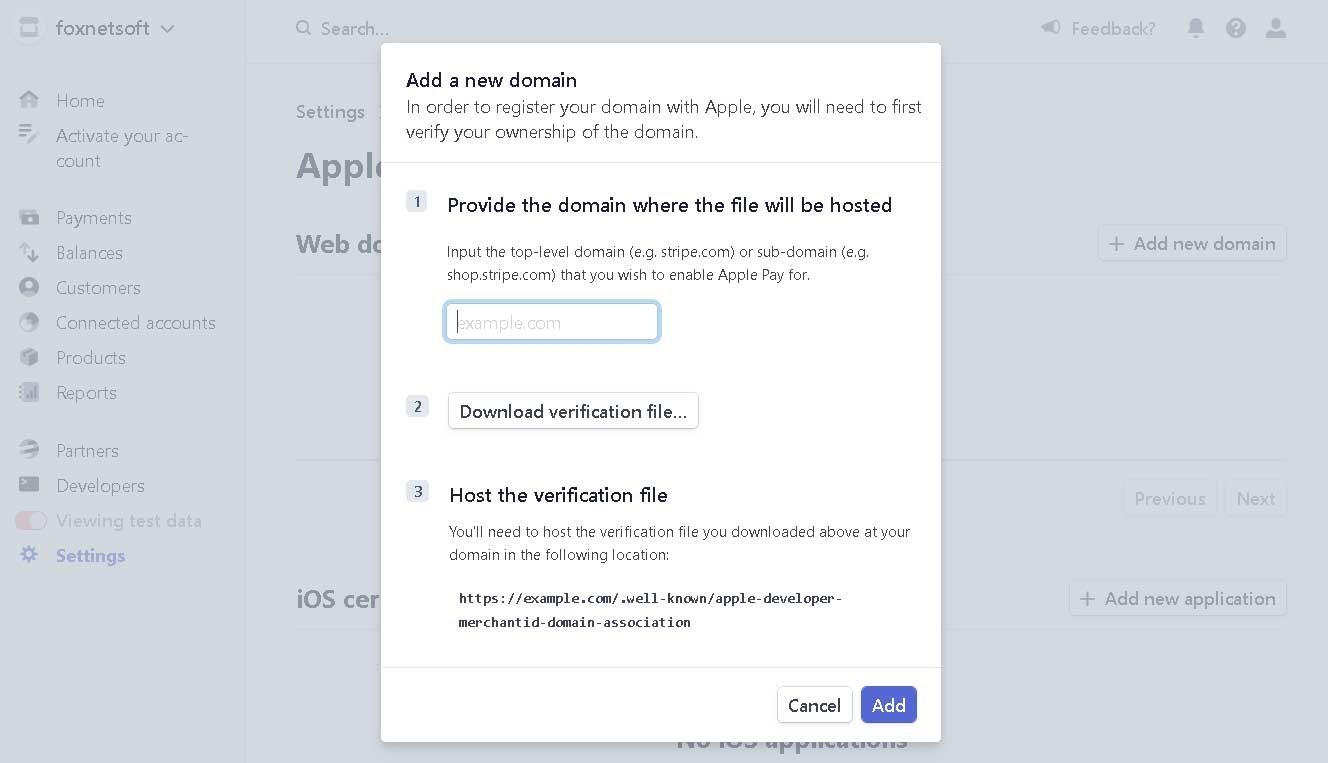
Installation and configuring plug-in Stripe Digital Wallets Pay attention! 1. Configuring the plugin configure page 1. Configuring the plugin configure page Create Stripe API keys, copy them on the plugin configure page. Configure the webhook. You can set the description of the each payment and the customer will see in the his bank account. Configure the style of the button. 2. Configuring Google Pay: 3. Configuring Apple Pay: 4. Verifying your store for Apple Pay using .well-known file. You can use this plugin .well-known domain validation for verification Open the shopping cart page and check the Google Pay/Apple Pay. If the browser doesn't support Pay/Apple Pay you will not see anything.
Your site must use https SSL.
Apple Pay and Google Pay work only mobile devices (not for PC)
Google Pay - only Chrome with attached credit card and on mobile devices (if you use the desktop you will not see it)
Apple Pay - only IOS with the attached credit card and on mobile devices (if you use the desktop you will not see it)
https://stripe.com/docs/stripe-js/elements/payment-request-button#testing
2. Configuring Google Pay
3. Configuring Apple Pay
1. Add the credit/debit card in your Google Account
2. Add HTTPS for your store
3. Use Chrome (Mobile) with attached Google Account with the credit/debit card
1. Apple Pay works only on iOS apps (Safary with attached credit/debit card)
2. Add HTTPS for your store
3. Enable Apple Pay in the Stripe dashboard


