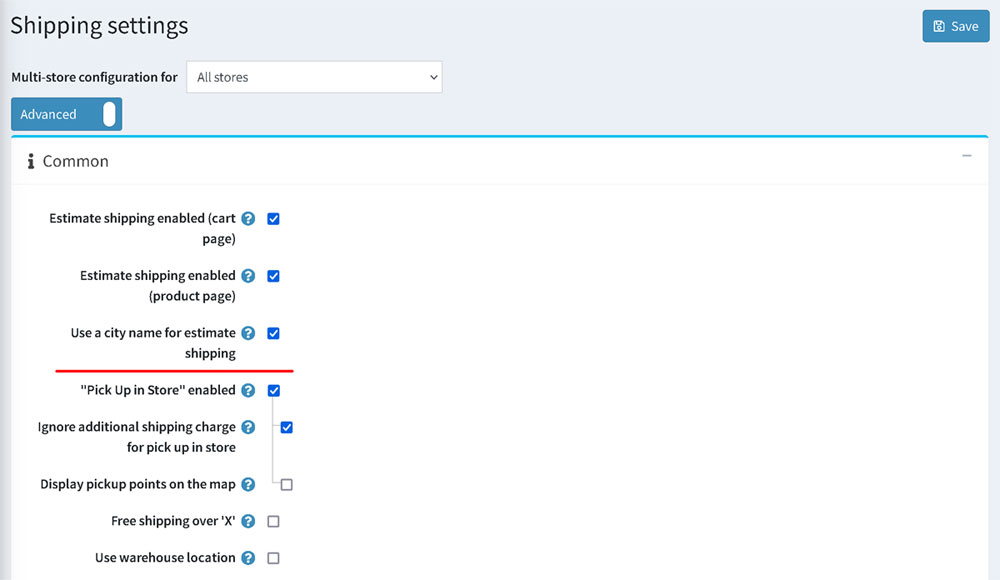
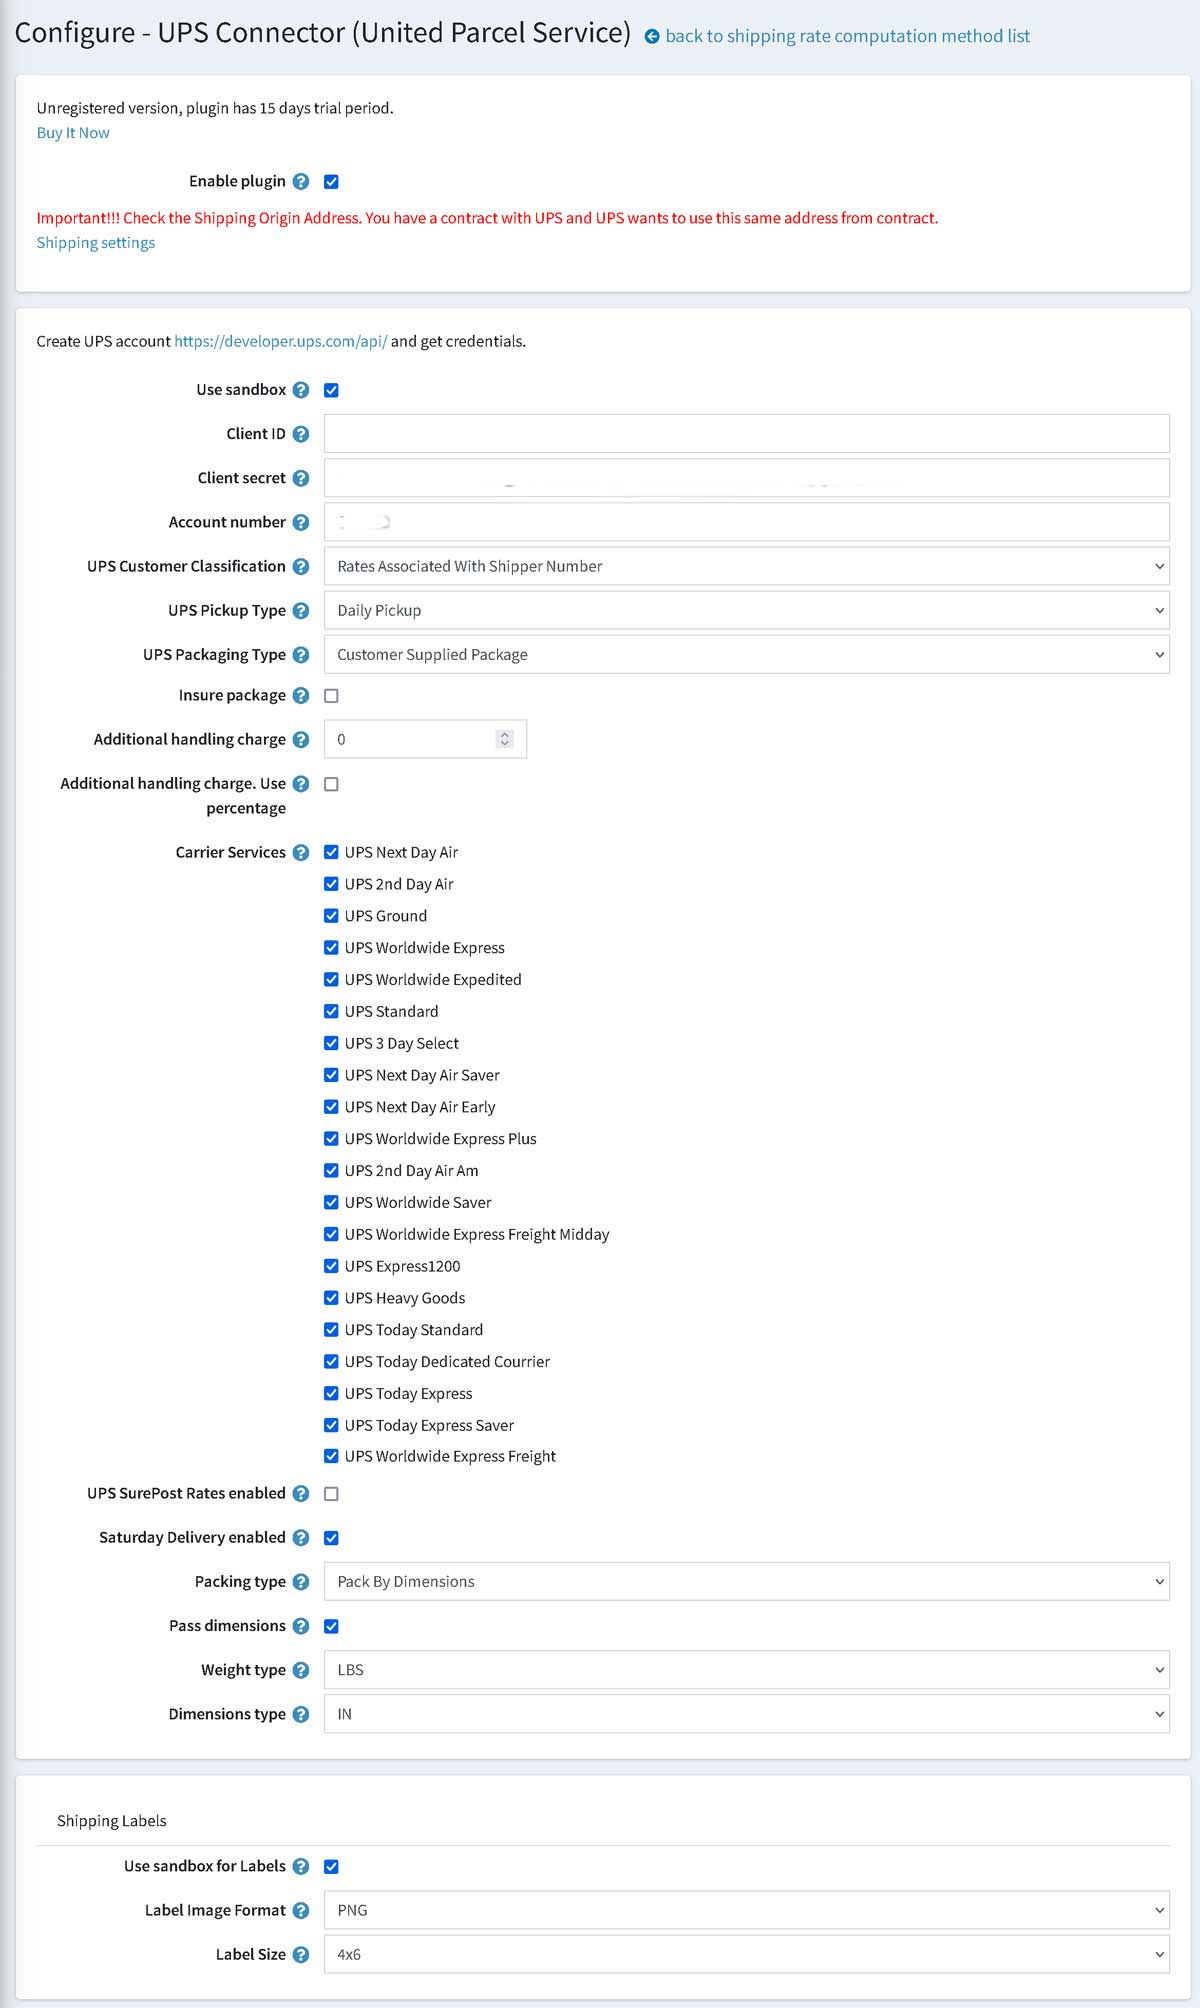
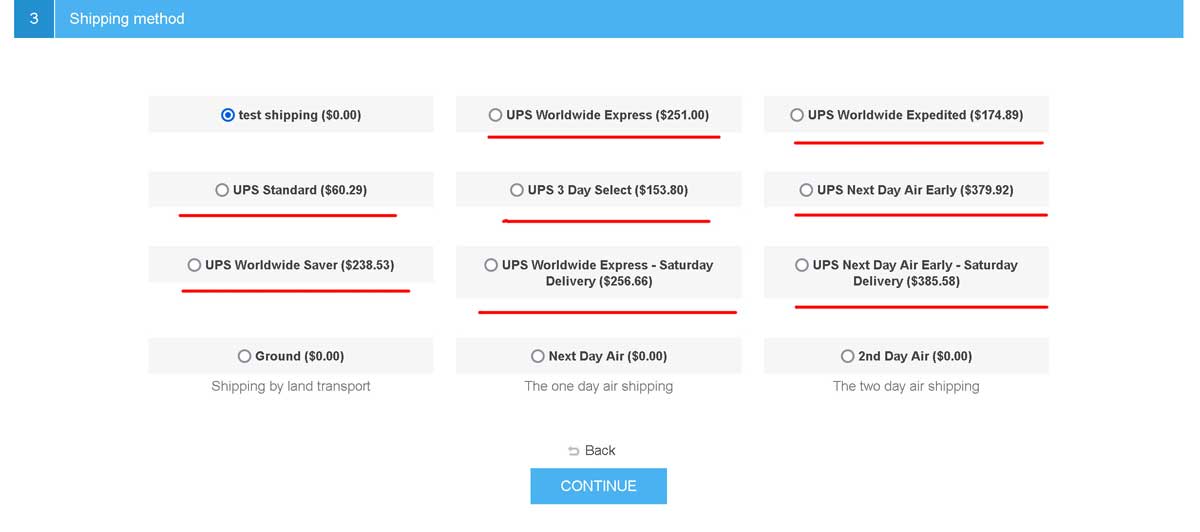
Installation and configuring plugin UPS Connector It's very easy to configure plugin. Copy Client ID and Cleint Secret to the plugin configure page. First of all you should configure nopcommerce Shipping origin address (see example) Check if you enabled "Use a city name for estimate shipping". It's mandatory for "Estimate shipping" feature. Create OAuth 2.0 credentials and copy them to the plugin configure page. You use sandbox for testing the plugin. You could use sandbox for getting rates and print labels. Try to checkout and check the result If you would like to create labels you should open the list of orders and chose the paid order or to create the shipment. You will see the button "UPS Post or UPS". When you select "Generate Labal" then you will be redirected to the new page. This page has a lot of paramaters and you could change them. Press the button "Create Label" - (the right top) and you will see the label. When you open the order or shipment with existing tracking number (you have created the shipping label) then you will see the different menu. You could void the label (if the shipment wasn't delivered). The plugin has the extra feature.
Open the UPS site https://developer.ups.com and login.
Create a new application and select the APIs : Authorization ( OAuth), Rating, Shipping, Tracking.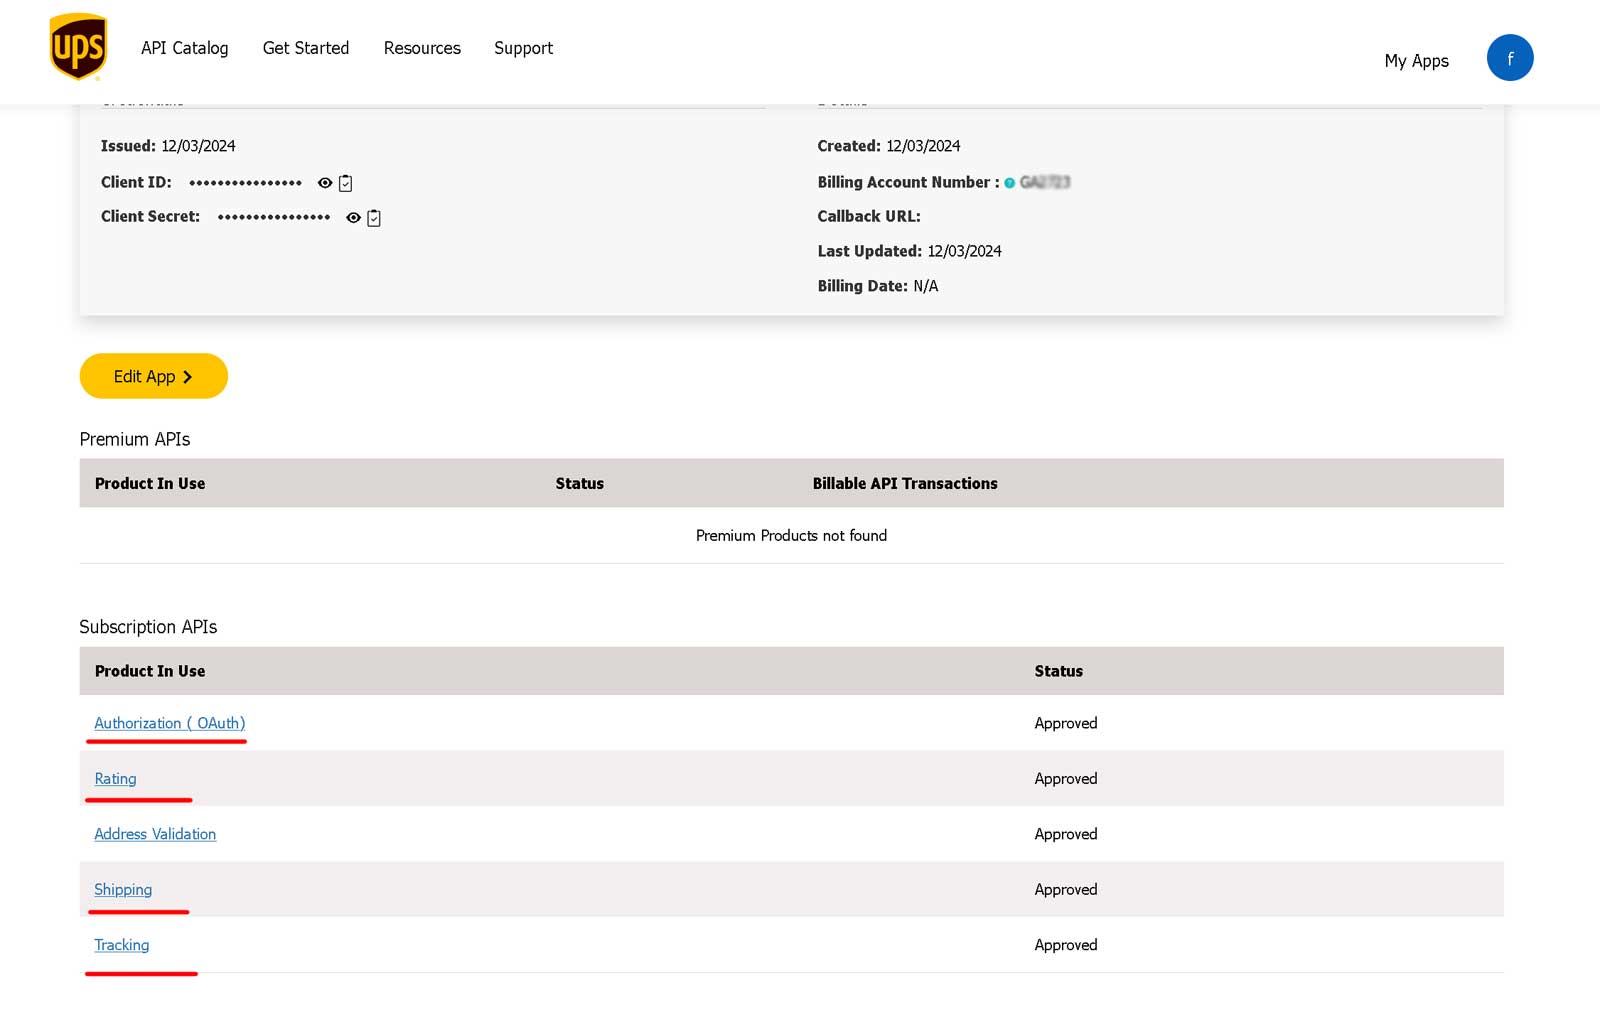
This button will have possible menu items for the selected order/shipment.
This example for the order/shipment that ready to ship.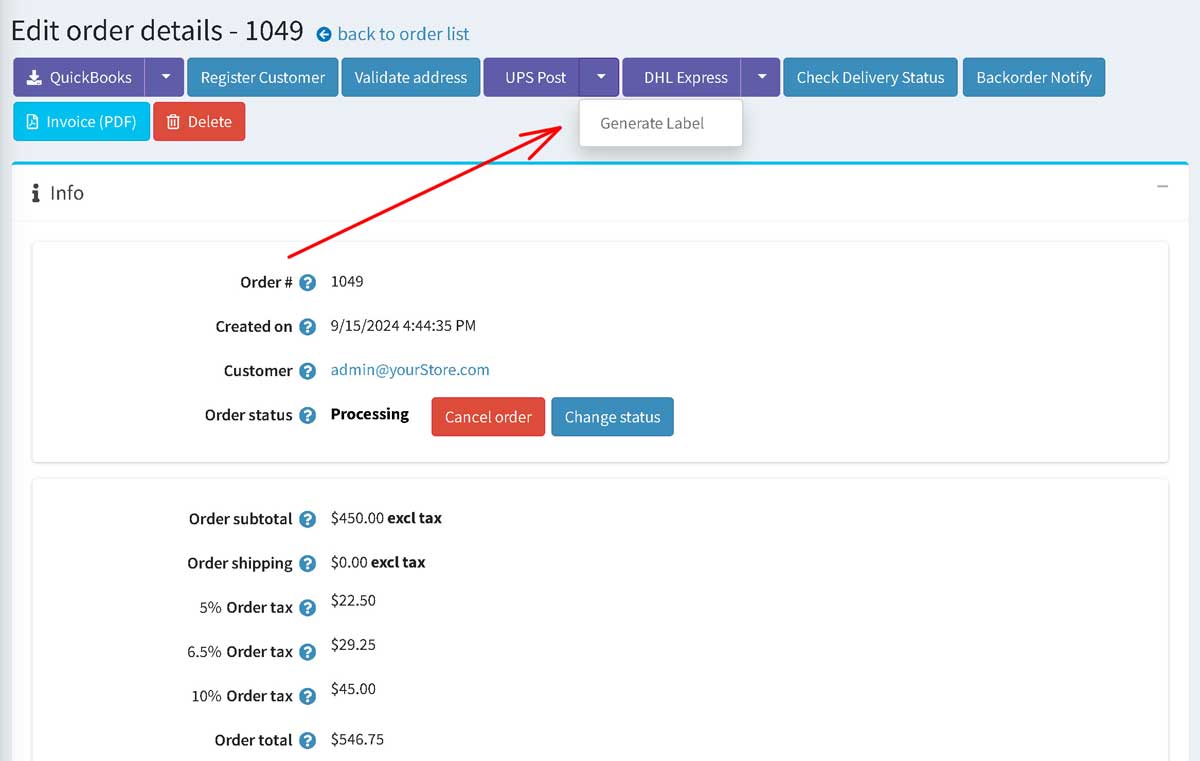
You will see the prepared packadges for the shipment (dimentions and weight). You could change/add/remove existing packadges.
You will see the shipping rates at the next section. You could recalculate shipping rates. This page has the section with the addresses (Ship From and Ship To).
If you use warehouses you will have the combobox and will be able to change the warehouse.
The last section is the list of products in this shipment.
If you use the one shipping address (without warehouses) you could create shipping labels from orders and from shipments.
When you create the shipping label from the order the pluign creates the shipment automatically.
If you use very complicated logic woth warehouses you should create the separate shipment for each warehouse.
Each shipment will have the tracking number.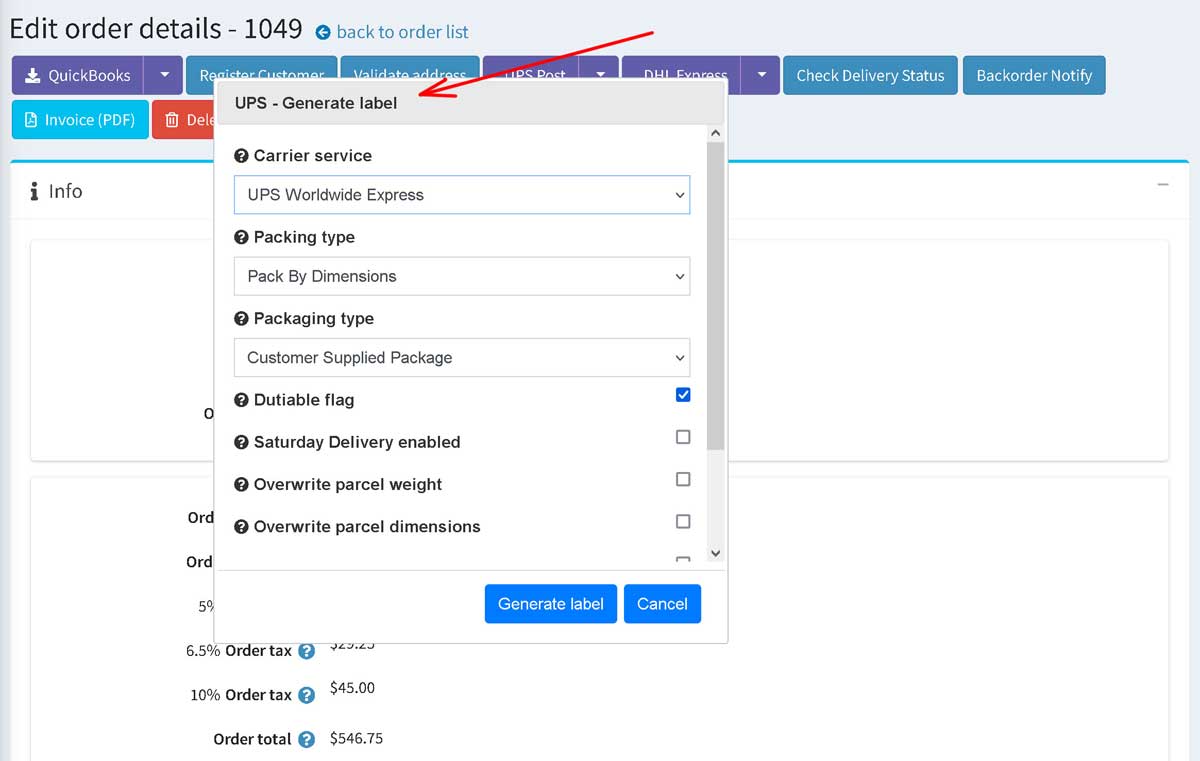


You could create the Return Label (if the shipment was delivered). This is the example of the Return Label window. It has the same fileds, you could change settings for the parcel and packadges (dimentions and weight).
This page has the new field "Return Label Type" - to send the return label and send it to the customer by email or to create the return label as a picture file.
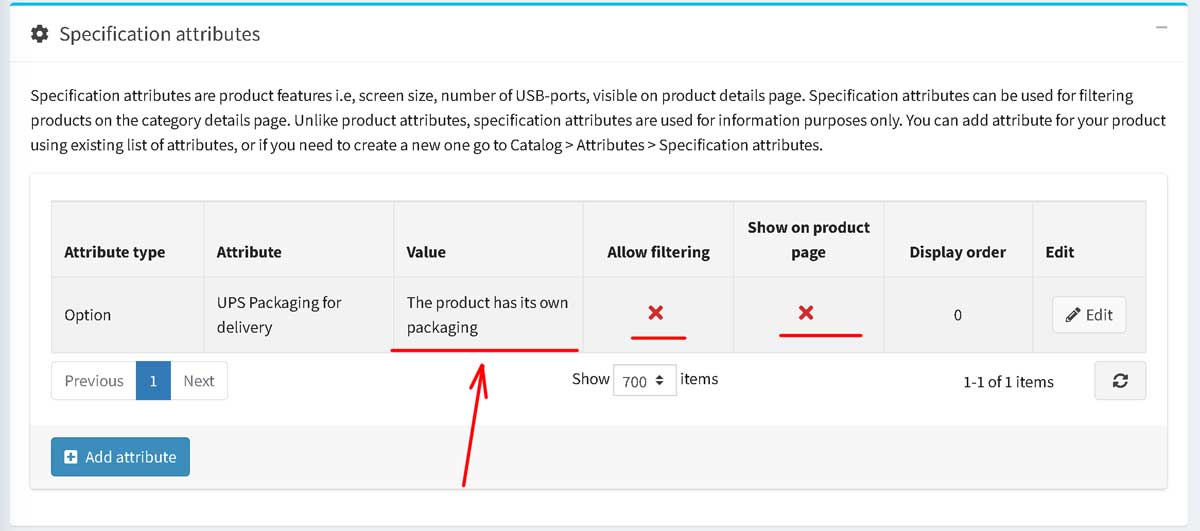
You could confgiure that one product has it's own packaging (the box from the manufacturer).
The plugin adds the new special attribute "UPS Packaging for delivery" - "The product has its own packaging".
You could add it to the product and the plugin will create the new packadge for this product.
Example:
The customer purchased: the Printer, photo paper and cardridges. The printer has the factory box.
If you added the special attribute "UPS Packaging for delivery" to the printer. The UPS Connector plguin will create two packadges - one for the printer and second for the photo paper and cardridges.